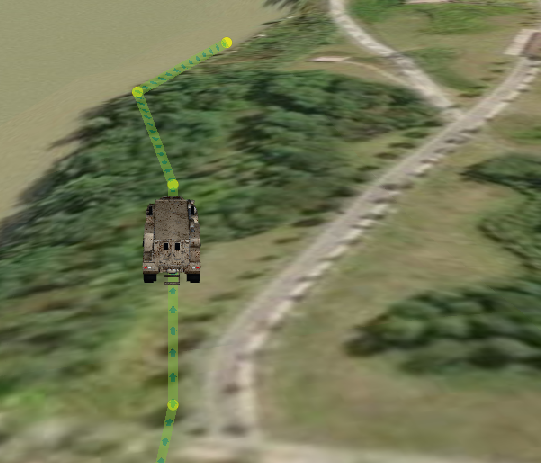
基本思路:
- 1、获取获取带时间戳的路径点
- 2、绘制点图形和折线图形
- 3、然后按顺序两两生成Tween线性插值并更新模型位置
- 4、同时更新主视角相机位置和朝向姿态。
- 5、其他周边操作,比如结束的回调等。
获取路径点
轨迹的来源多种多样,这里直接限定一个格式
js
Array<{lon: Number, lat: Number, height: Number, timestamp: Number}>需要提供带海拔高度的坐标,用于获取Catisian3;和当前时间,时间用于提供插值计算。
绘制图形
绘制点
这里使用Primitive的方式绘制,用entity绘制可能会有性能问题。点太多了
js
drawPiont() {
    this.points = new Cesium.PointPrimitiveCollection({ blendOption: Cesium.BlendOption.TRANSLUCENT })

    this.options.points.map(p => {
        return {
            position: Cesium.Cartesian3.fromDegrees(p.lon, p.lat, p.height),
            color: defaults(this.options.pointColor, Cesium.Color.RED.withAlpha(0.7)),
            pixelSize: defaults(this.options.pointWidth, 10)
        }
    }).forEach(p => this.points.add(p))

    this.viewer.scene.primitives.add(this.points)
}需要打开TRANSLUCENT到时候显示的效果会好一点。
绘制折线
折线也采用Primitive的方式绘制。
js
let degreeHeights = this.options.points.map(p => [p.lon, p.lat, p.height]).flat()

this.polyline = new Cesium.Primitive({
    geometryInstances: new Cesium.GeometryInstance({
        geometry: new Cesium.PolylineGeometry({
            positions: Cesium.Cartesian3.fromDegreesArrayHeights(degreeHeights),
            width: defaults(this.options.polylineWidth, 2),
        }),
        attributes: {
            color: Cesium.ColorGeometryInstanceAttribute.fromColor(defaults(this.options.polylineColor, Cesium.Color.YELLOW.withAlpha(0.5))),
        },
    }),
    appearance: new Cesium.PolylineColorAppearance({
        translucent: true
    }),
})
this.viewer.scene.primitives.add(this.polyline)
直接获取Cartisian3[] 绘制,并预留颜色、宽度等默认参数。
有可能需要绘制流动线。
js
drawFlowLine() {
    this.polyline = new FlowLine(this.viewer, {
        // 线 Cartesian3[]
        positions: Cesium.Cartesian3.fromDegreesArrayHeights(this.options.points.map(p => [p.lon, p.lat, p.height]).flat()),
        // 线宽
        width: defaults(this.options.polylineWidth, 2),
        // 流动速度
        speed: defaults(this.options.flowLineSpeed, 0.01),
        // 底色
        color: defaults(this.options.flowLineColor, Cesium.Color.TEAL.withAlpha(0.5)),
        // 纹理
        image: defaults(this.options.flowLineImage, '/arrow-small.png')
    })
    this.polyline.play()
}FlowLine是我自己封装的一个实现,下集再说吧
生成插值
直接遍历所有的坐标,按顺序两两生成Tween对象
js
 this.group = new TWEEN.Group()

for (var pos = 1; pos < this.options.points.length; pos++) {
    let curr = [this.options.points[pos].lon, this.options.points[pos].lat, this.options.points[pos].height]
    let last = [this.options.points[lastPos].lon, this.options.points[lastPos].lat, this.options.points[lastPos].height]

    let temp = [last[0], last[1], last[2]]

    let sepAnimation = new TWEEN.Tween(last)
        .repeat(defaults(options?.repeat, 0))
        .interpolation(TWEEN.Interpolation.Bezier)
        .to(curr, (this.options.points[pos].timestamp - this.options.points[lastPos].timestamp) * options.speed)
        .onComplete(()=>{
            console.log("on complete--> ", pos);
            setTimeout(() => {
                this.viewer.camera.lookAtTransform(Cesium.Matrix4.IDENTITY);
            }, 1000);
            if (callback) {
                callback()
            }
        })
        .onUpdate((op) => {})

    if (animateChain == null) {
        animateChain = sepAnimation
        animateChainHead = sepAnimation
    } else {
        animateChain.chain(sepAnimation)

        animateChain.onComplete(() => {
            sepAnimation.start()
        })

        animateChain = sepAnimation
    }
    this.group.add(sepAnimation)
    lastPos = pos
}

function animate() {
    that.groupAnimationRequest = requestAnimationFrame(animate);
    that.group.update();
}
animate()首先生成分段动画sepAnimation, 动画开始的数据为上一次结果,结束为当前坐标位置,两个坐标的时间戳的差为动画的插值计算时长(预留播放倍速因子)。
在Tween的onUpdate里写上模型移动的算法,回调里会提供插值的数据。
在onComplete里写上整个动画链结束后的回调,便于调用方处理后续事务。chain起来的动画序列只会执行onComplete一次。
把所有的分段动画都加到group里,把group放到requestAnimationFrame里加入渲染循环。
其中,Tween支持多个动画链接播放,使用chain()即可链接起来
接下来就是显示onUpdate里的逻辑
js
var direction = Cesium.Cartesian3.subtract(Cesium.Cartesian3.fromDegrees(op[0], op[1], op[2]), Cesium.Cartesian3.fromDegrees(temp[0], temp[1], temp[2]), new Cesium.Cartesian3());
Cesium.Cartesian3.normalize(direction, direction);
var rotationMatrix = Cesium.Transforms.rotationMatrixFromPositionVelocity(Cesium.Cartesian3.fromDegrees(temp[0], temp[1], temp[2]), direction);
this.model.orientation = Cesium.Quaternion.fromRotationMatrix(rotationMatrix)先用先后两个点计算出向量direction。然后计算模型需要偏转+平移的矩阵rotationMatrix
模型移动了,当参数要求主视角跟随模型的时候,需要锁定主视角到模型
js
let transform = Cesium.Matrix4.fromRotationTranslation(rotationMatrix, Cesium.Cartesian3.fromDegrees(temp[0], temp[1], temp[2]));利用上边的rotationMatrix计算相机的朝向,然后利用lookAtTransform直接锁定过去。
js
 this.viewer.camera.lookAtTransform(transform, new Cesium.HeadingPitchRange(
    Cesium.Math.toRadians(defaults(options.trackHeading, 90)),
    Cesium.Math.toRadians(defaults(options.trackPitch, -30.0)),
    defaults(options.trackRange, 50)
));
这里参数是正后方、距离50米俯视30度。